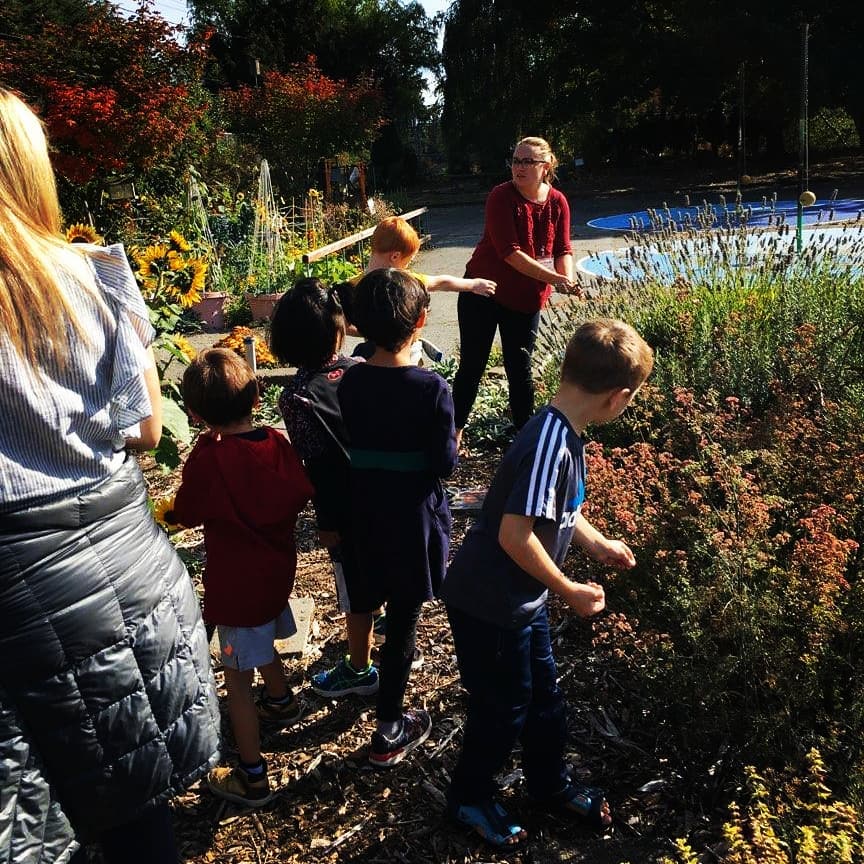
Garden lessons, school garden

Back to Class

As the state of Washington comes together to take care of each other and get the vaccine–making it safer for students to return to school–Nicole and the students haen able to get back out into the garden.

Some of the most recent lessons that the students have been working on involve learning about pollinators! Nicole and the students are not only learning about the functions and form of pollinators, but they are also designing their own. Engineering pollinators from materials is a great way that students can practice Next Generation Science Standards that keep them on track for science and environmental literacy. 

In the school learning garden, students get an opportunity to search for real live pollinators and observe what colors of flowers they are attracted to. The pollinator color investigation reinforces the importance of pollinators in our garden and gives students the chance to come up with ways to encourage more pollinators to visit our school garden.

Since Spring is here, learning about the pollinators is a great transition back into the garden after a year and a half away. As we welcome your students back to the on campus gardens, they will notice changes that they or their peers have helped participate in during one of our many work parties.

During the work parties, we have added a few new beds, including a garden bed style from another culture. The newest bed, called “Hügelkultur”, is a form of German mound gardening. The unique hill shape allows for the sun to hit it in different ways so that more sun-loving plants can grow on one side, and more shade tolerant ones on the other. It also allows for more plants to grow since there is more surface area in the bed than if it were on a flat surface. Finally, it is made out of logs, which will decompose over time, adding rich compost to the soil.

During the work parties, we have added a few new beds, including a garden bed style from another culture. The newest bed, called “Hügelkultur”, is a form of German mound gardening. The unique hill shape allows for the sun to hit it in different ways so that more sun-loving plants can grow on one side, and more shade tolerant ones on the other. It also allows for more plants to grow since there is more surface area in the bed than if it were on a flat surface. Finally, it is made out of logs, which will decompose over time, adding rich compost to the soil.

If you can, join us for our final garden party this Sunday, June 6th! We will be further beatifying our already gorgeous Cascadia Learning Garden.  

Garden lessons, Workshops and presentations

Stories from the Garden

Nicole did a  workshop with the School Learning Garden Network. This is a for-garden educators, by-garden educators event which aims to connect the Seattle (and broader) school garden community and share stories, successes, failures, and resources.

Her workshop is one in a series that would have been presented at the annual Winter Workshop, which was cancelled due to COVID-19. Now, the School Learning Garden Network is offering these FREE online events for anyone interested in learning more about the amazing work of garden educators and community members who support school gardens in the Seattle area.

The presentation is called “Stories from the Garden” and highlights the various school garden programs Foxberry Education has been involved with. Nicole’s co-presenter, Patty Lavelle is the Garden Educator at Jane Addams Middle School, which is the location the in-person event would have been held at. Patty has an amazing virtual tour of their school garden as well. Stories from the Garden also presents an opportunity for parents to learn tips and tricks for working with their kids in the garden!

Check out the presentation today!

Stories from the Garden

Uncategorized

Winterization in the School Garden

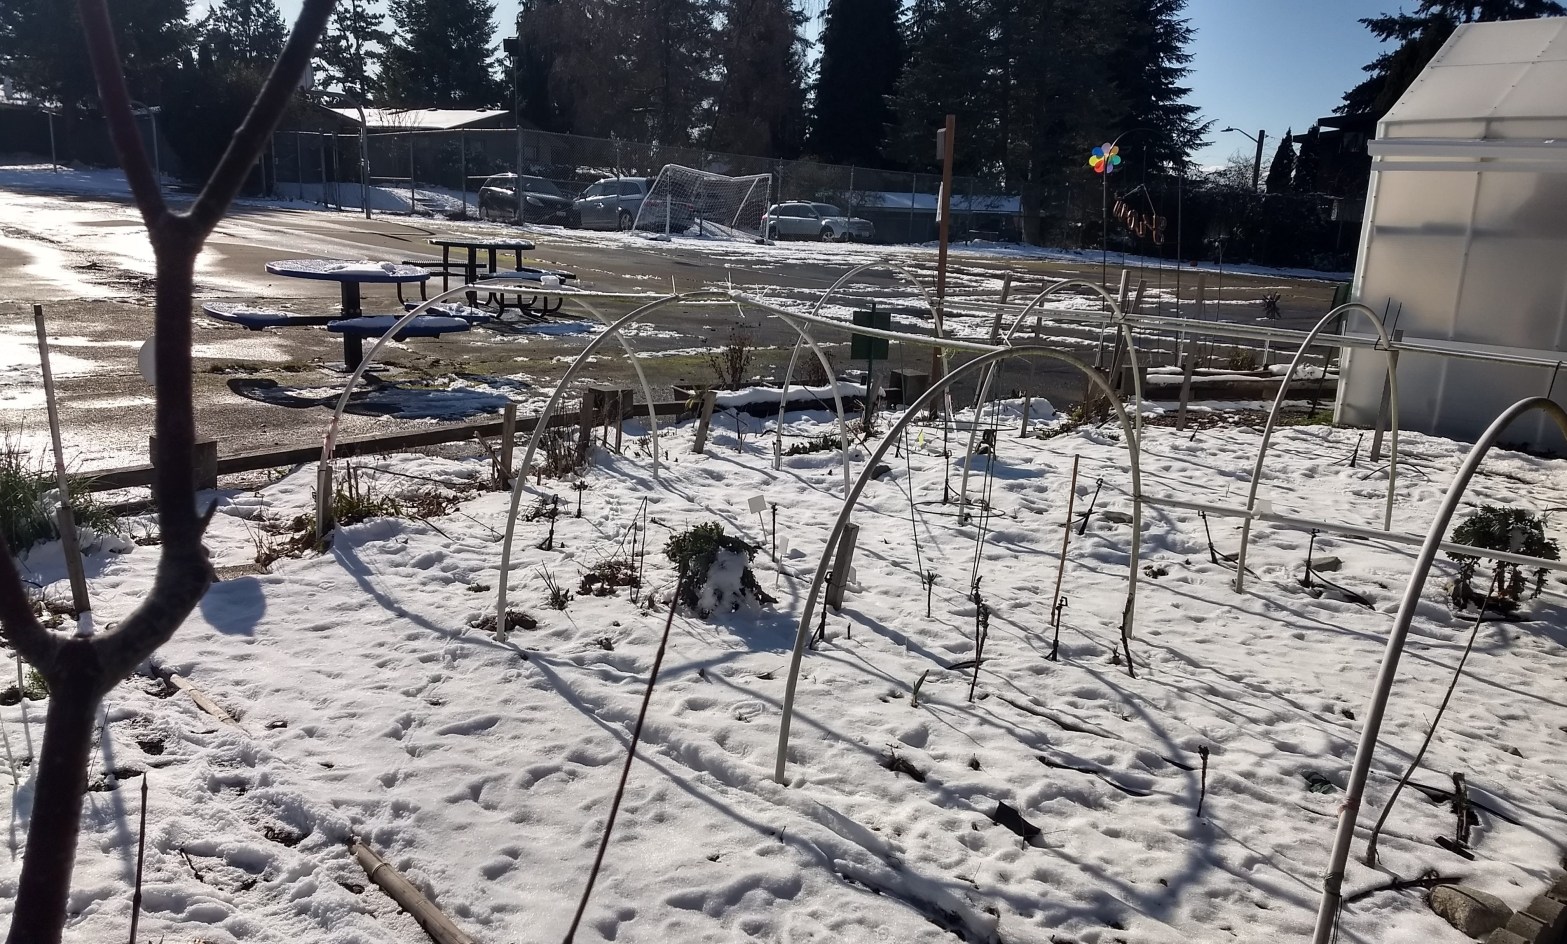
The days are growing shorter, colder, and darker, and people and animals alike must begin to make previsions. We shed our so-called “summer coats” for heavier, bulkier winter ones. In this time of change it is time to prepare your garden for the coming months.

IMG_20190206_130105791-COLLAGE

Beds

Just like you probably add a few additional layers to your own bed during the winter time, you can “bundle up” your garden beds too! There are three good reasons to do this. and two different methods we suggest. First of all, covering your beds will prevent erosion, or soil loss, and perhaps nutrient depletion in the harsh winter storms.  Covering the soil will also keep it from getting too compacted. Leaving space between soil particles will make it easier to plant seeds in the spring and help roots and bugs find their way. Thirdly, covering the beds will help to prevent weeds from growing over the Fall, Winter, and early Spring, which will make your job of planting easier later on.

Wedgwood Beds

The two methods we suggest are using cover crops and burlap. Hay works as well, but can have seeds in it which may germinate and be a pain in the Spring. You can also cover your beds with cloches to extend the growing season a bit, but that is for another post!

IMG_20181204_142705188_HDR

To cover with burlap, make sure the bed is fully cleaned out of any previous crops and/or weeds.

If you have compost to add, you can do so, as well as adding lime to enrich the soil. If you do this, make sure to use a soil test and follow the instructions on how much lime to use.

Next, cover the soil with burlap and pin it down with rocks or garden staples. In the Spring, you will have rich, fluffy soil to plant in!

Cover crops are another great way to cover your beds. Not only do they provide all the benefits of burlap by holding the soil in place and maintaining space between soil particles, but they also serve to add nutrients to the soil!

IMG_20190119_163159318

Cover crops such as fava beans and other legumes “fix” Nitrogen from the air and store it in their roots. This means the plants have to be worked into the soil to get the benefits. First, you will want to clean out the bed just like with burlap.

Secondly, plant the cover crop seeds as instructed on the packet. Make sure to keep an eye on the plants, and as they flower, chop them up and work them into the soil.

Worm Bin

Does your Learning Garden have a worm bin? If not, it should! If so, have you found your worms seldom make it through the winter? Here are some tips that should help!

IMG_20181204_142721384_HDR

Begin by making sure the bin is big enough that the worms can cuddle for warmth. We recommend at least 2x2x2.

Next, move the soil and worms towards the middle of the bin so you can line the inner walls with cardboard.

This will help to insulate the bin, and the cardboard will eventually break down and become part of the worm bin itself. You should also add a few extra layers of newspaper and burlap to the top to retain heat and moisture.

Also keep in mind that if you do lose your worms, their eggs can withstand freezing temperatures and should be able to hatch come Spring!

Chicken Coop

If your Learning Garden contains a chicken coop (lucky you!), then there are a few recommendations we have for helping your fine feathered friends fare the foul frosts. Firstly, you can line the inside walls of the nesting box with cardboard just like with the worm bin. IMG_20181201_141401248_HDR.jpg This will help to insulate the area where they lay and sleep.

You can also add some extra layers of pine shavings and not clean as much out when you do change the litter. This is called “deep litter method”. It helps to keep the roost warm and cozy by allowing the compost to break down and heat up naturally.

Avoid the temptation to install a heat lamp during the winter. Not only can this be a fire hazard, but chickens are actually pretty good at withstanding low temperatures. Creating too much of a temperature difference between their coop and the outside will just make it harder for them to regulate their own body temperature.

Finally, stapling a sheet or two of plastic to the outside of the run can help to keep out the wind, rain, and snow. Be careful to leave a certain amount uncovered to allow for ventilation.

img_20190204_102035469_hdr-1.jpg

Hope your winter is not too harsh! Let us know if this was helpful to you, or if you have any questions about/need assistance with preparing your garden this season.


Sources and Resources:

Methods of Winterizing your Garden

The Art of Cover Cropping: Sustainable Care for a Happy Garden

Regulating Temperature in a Worm Bin

How to Keep your Chickens Warm in the Winter

Chickens & Body Temperature: What you need to Know

Garden lessons

Herban Legends

This cold late Fall weather is the perfect time to cozy up and make some tea. Why not share the tea-making love with your kids in the garden? And while you’re at it, share the amazing benefits and stories herbs and spices have given us throughout the years…

Before getting into the tea making activity, share a story with the students about an herb or spice in history. The one that I like to share is the story of Prometheus and how he stole fire from the gods with a sprig of fennel.IMG_20190913_144731560_HDR Many kids are really into both fennel and Greek Mythology, so this goes over pretty well. However, you can make this experience your own by sharing a different story about another herb that your kids enjoy! Here are some each-one-teach one cards that I have created to help the kids understand both the historical significance of herbs and how they have been used both for medicinal and culinary purposes in the past.

With that knowledge in mind, it is time for the kids to put their learning to practice by harvesting and serving up some fresh garden tea themselves! There are a few different ways to create a lovely tea-party experience in your learning garden.

Tea party
Preschool Tea Party at Magnuson Children’s Garden

One way to celebrate our “herban legends” is by making a community tea pot together with your students. Show them the IMG_20190913_144458110different varieties of herbs you have in your garden space and how to harvest and cut the plants into small pieces in order to make fresh mint, lemon balm, rosemary, etc. tea! Let them mix and match and make fun combinations. A boy in one of my after-school programs even decided to make chive tea, which the other students really loved! Once all the herbs have been harvested, rinsed, and chopped, they can either be put in a french press or a tea pot and then strained to serve! I usually add a little bit of sugar.

Another method to allow students to take home their tea treasures is to teach them how to make homemade tea bags. IMG_20191025_133247707This can be done with store-bought disposable tea bags, or for a more rustic look, cheese cloth and string! Simply cut the cheese cloth into about 5×5” squares for the students to fill with various herb clippings and cut out lengths of string for them to tie them closed with as well as to use as the “dipper”.

Finally, sip your tea and enjoy! Cheers!

Multicultural Education

Multicultural Garden Education

I would like to begin this post by stating that I am by no means an expert in Multicultural Education or Cultural Competency. I simply strive to do my best with the subject at every opportunity and improve upon my lessons where possible with Cultural Relevancy in mind. These are some strategies I have found effective and learned through both research and trial and error. Perhaps they can help you with making your garden program more culturally informed.

img_20190916_145702516.jpg

1. Know your kids’ names and how to pronounce them correctly

This is an area many educators, including myself can sometimes struggle with when they have hundreds of kids from various backgrounds. Remember, it is okay to make mistakes in this when first learning your kids’ names. What is not good and can be very damaging is remembering some kids’ names and not others or consistently pronouncing certain names wrong. Our names are one of the most concrete links we have to our identities. Our names often have meaning, either personal, familial, or cultural. When teachers, bosses, or other people in positions of power continuously get that key part of someone’s personality wrong, it can have a significant and lasting impact. This topic deserves more than just a bullet point in a blog- in fact, there are several articles on the importance of getting names right and strategies to help with it. Some that have worked for me are:

a. Make sure to ask what the student prefers to be called, even if it changes from one month to the next. I had a student whose given name was Margaret but she wanted to be referred to as “James”. While this didn’t stick, she was much more receptive to staff that respected her wishes of what to be called. I had another student who wanted to go by “Cash” for a summer, and even put it on his name tag. Be mindful when a student is experimenting with their own identity.

b. If you make a mistake, apologize and move on. Ask the student to give you the correct name again. Repeat the name back to the student until it sticks- it doesn’t hurt to ask again.

c. Have the name in writing associated with the student- use name tags or a seating chart with a written guideline for yourself for as long as you need to until you remember. If you are a visual learner, this can be extremely effective.

d. The old mnemonic device trick. Sometimes, without letting the kids know I’m doing this, I will come up with a trick for remembering kids’ names by associating them with one or more things that their name sounds like or that reminds me of them. If I have to, I write it down!

2. Representation of different cultures and backgrounds in materials in and around the program space

Kids don’t always see themselves in the literature presented in the classroom. Showing a diverse variety of gender, age, race etc. can be a simple way of making students of various groups feel welcome and included. This can be as easy and finding books that show different skin colors, or showing a youtube video of someone from another country. Representation in materials can also expand to the posters and print outs hung on the wall or the space. I give an example of this on my other blog where I highlight the Eco heroes I incorporated into one of my programs.

3. Signage in different languages

This step is pretty straight forward. However, in my experience, a lot of educators are weary of different languages being spoken in their classrooms. They are distrustful that the students are being appropriate or staying on task. 20190913_112243-COLLAGE In some cases, the language differences have even been a source of bullying behavior from students who choose to mock or imitate their bilingual classmates. This can be helped by celebrating the array of different languages in your program. Try having a “word” of the day up and asking if the students would like to share how it is said in each language they speak. You can also create signs for your plants that show a variety of languages. Sometimes you might be surprised when a student can read one in Russian, Arabic, or French!

4. Grow culturally relevant plants

Along with providing signage in various languages, you can also do some research around and provide vegetables and fruits that students might be familiar with.

img_20190916_145655670.jpg

For example, in one of my programs, I organize the beds into “recipes” such as pizza, stir-fry, and borscht. The kids get excited when they recognize the ingredients to some of their favorite meals from home. In the beginning of the program, you can ask what the students eat at home, what their grandparents make them, or just what their favorite meal is. This is a great jumping off point from which to design your recipe beds!

In addition to the plants themselves, you could employ growing methods that students can mimic at home, making the activity more accessible.

img_20190916_145639728.jpg

For example, planting things that grow well in containers or vertical settings for those that don’t have a big space to garden in at home.

5. Do your research and provide options

As I hope you have gathered from this post, culturally relevancy is not just black and white. It includes race, ethnicity, gender identity, ability, and much more. Make sure to get to know your students and their specific preferences. Not all students are the same, and not all students from one group will want to be treated the same way. When possible, give students choices in how they choose to do an activity, based on their ability, special skills, and  knowledge base. Sometimes being flexible with your lesson will allow your students show you a new way of doing things you might never have thought of!


Sources and Additional Resources:

http://neatoday.org/2016/09/01/pronouncing-students-names/

https://www.huffpost.com/entry/say-her-name_b_587852c9e4b094e1aa9dc4f8

https://www.edutopia.org/blog/why-representation-matters-laura-thomas